Once again I have delved into simulating video feedback.
Here is a 4K resolution 60 fps movie with some samples of what the new simulations can do.
This third attempt is fairly close to second version but with a few changes I will explain here.
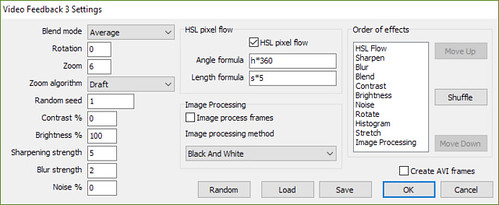
The main change is being able to order the effects. This was the idea that got me programming version 3. A shuffle button is also provided that randomly orders the effects. Allowing the effect order to be customised gives a lot of new results compared to the first 2 video feedback simulation modes.
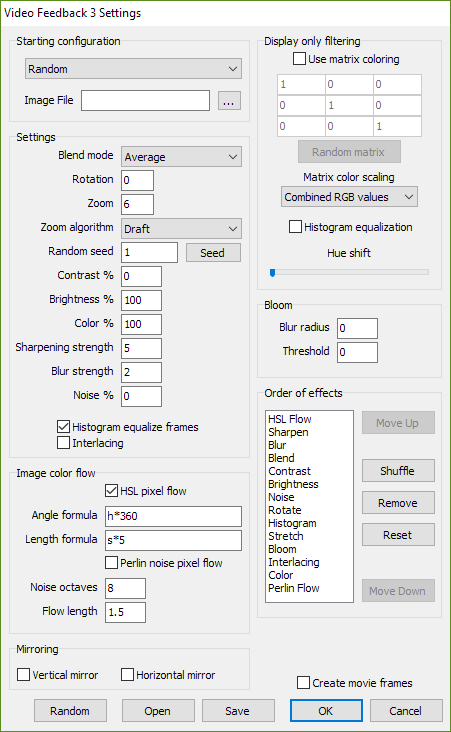
Since the above screenshot, the settings have continued to grow.
Here are some explanations for the various effects.
HSL Flow
Takes a pixel’s RGB values, converts them into HSL values and then uses the HSL values in formulas to select a new pixel color. For example if the pixel is red RGB(255,0,0), then this converts to HSL(0,1,0.5) assuming all HSL values range from 0 to 1. The length formula above is H*360 and the length formula is s*5. So in this case the new pixel value read would be 5 pixels away at the angle 0 degrees. Changing these formulas allows the image to “flow” depending on the colors.
Sharpen
Sharpens the image by blurring the image twice using different algorithms (in my case I use a QuickBlur (Box Blur) and a weighted convolution kernel). The second blur value is subtracted from the first and then using the following formula the target pixel value is found. newr=trunc(r1+amount*(r1-r2))
Blur
Uses a standard gaussian blur.
Blend
Combines the last “frame” and the current frame. Various blend options change how the layers are combined.
Contrast
Standard image contrast setting. Can also be set for negative contrasts. Uses the following formula for each of the RGB values r=r+trunc((r-128)*amount/100)
Brightness
Standard brightness. Increases or decreases the pixel color RGB values.
Noise
Adds a random value to each pixel. Adding a bit of noise can help stop a simulation dying out to a single color.
Rotate
Guess what this does?
Histogram
Uses a histogram of the image to auto-brightness. Can help the image from getting too dark or too light.
Stretch
Zooms the image. Various options determine the algorithm used to zoom the image.
Image Processing
Allows the various image processing functions in Visions of Chaos to be injected into the mix for even more variety.
Less Is Sometimes More
Another feature I added recently was to randomly remove some of the effects in the “order of effects” list. This means there is less processing done each frame, but having only 3 or more effects has given many new unique output patterns and results. So rather than throw every possible image processing step you can think of at it, pick a smaller subset of them.
Here is a more recent sample with some of the newer simulation settings I found while trying endless random settings.
Even More Enhancements
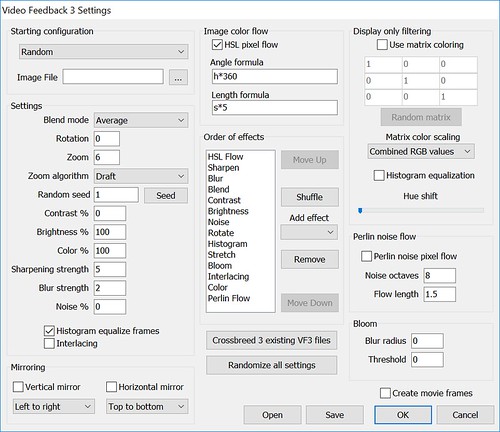
The next step I tried was breeding existing parameters to make new simulations. This is done by loading one of the vf3 parameter files and then another 2. When the second 2 files are loaded each setting has a 33% chance of being loaded. This results in roughly one third of the settings from each file being applied.
Another change is to allow effects in the effects list to occur more than once. So for example rather than an effects list of blur, sharpen and blend the list could now be blur, sharpen, blur, blend, sharpen. This also leads to new results.
With the new settings, the dialog has been expanded as follows
Here is another sample movie showing results from crossbreeding the existing sample files into new results.
Tutorial
The following tutorial explains the Video Feedback 3 mode in more detail.
The End – For Now
As always, you can experiment with the new VF3 mode in the latest version of Visions of Chaos.
I would be interested in seeing any unique results you come up with.
For the next version 4 simulation I would like to chain various GLSL shaders together that make the blends, blurs etc. That will allow the user to fully customise the simulation and insert new effects that I did not even consider. Also GLSL for speed. Rendering the above movie frames took days at 4K resolution.
Jason.


